Updated 21 October 2020 to include graphics tablets and webcam options
Updated 5 January 2022 with minor updates to links
We start this blog post with a short exercise for the reader: search Google Images or an image library for the word teacher.
I hope that you see a range of diverse people in the pictures. But I bet that most of them will have a pen or chalk in their hand, and a board or surface at their side. The act of writing and talking as a form of instruction is perhaps the most commonly perceived characteristic of who a teacher is and what they do.
The move to remote teaching has made writing as a form of teaching more difficult. A mouse may be great for controlling a computer, but it’s hard to use it to write smoothly on screen.
So in this post, we will look at how we might continue to use writing as a form of teaching, even from home.
Before we start, a note on accessibility. Whilst we teach remotely, so of the facilities that our students might have relied upon (like captions, transcripts, note-takers or signers) might not be available, so we may need to make alternative accommodations. Please do think about this before you plan your teaching and contact Digital Education if you would like advice.
Using a visualiser at home
In the classroom or lecture hall, many rooms will have a visualiser (also called a document camera) for showing writing and objects. These are typically hooked up to a projection screen through the AV system and are also captured by lecture capture. UCL uses a mix of table-top visualiser and ceiling mounted visualisers from a company called Wolfvision.
You can also buy more consumer-level products in this category. At home I use an IPEZO VZ-R camera, which costs about £200.

IPEVO VZ-R Visualiser (source: ipevo.com)
The camera connects via USB and can be used in two ways:
- Directly as a webcam, either replacing your main video feed or in Zoom you can share a second camera in the same way you might share your screen
- Using the IPEVO Visualizer software which is available as a free download for multiple platforms, and then sharing this application
Either method works well, but I’d recommend the latter as webcam video is often heavily compressed. This method works well with all our supported platforms, including Lecturecast (Echo 360) Universal Capture Personal, Zoom, Microsoft Teams and Blackboard Collaborate.
The camera is compact but sturdy. It has an in-built light, and facilities such as zoom and autofocus, and can capture a surface slightly less than A3. It also has an inbuilt microphone which is likely to be closer to you when you are speaking than one in a laptop.
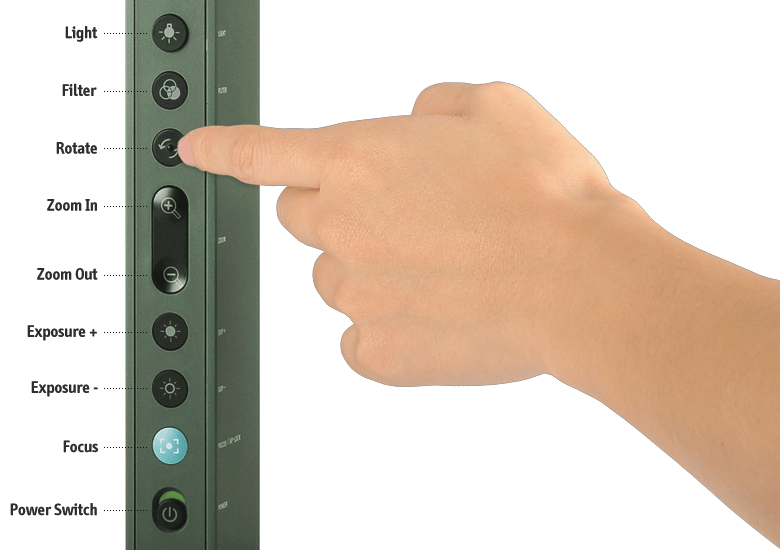
Control buttons on the IPEVO VZ-R (source: ipevo.com)
The software can control the features of the camera, and can make recordings that you could upload to Lecturecast, for example. The controls neatly get out of the way when they aren’t being used, so that you can focus on the content. The image below shows the auto-focus in operation, clearly capturing a book cover.
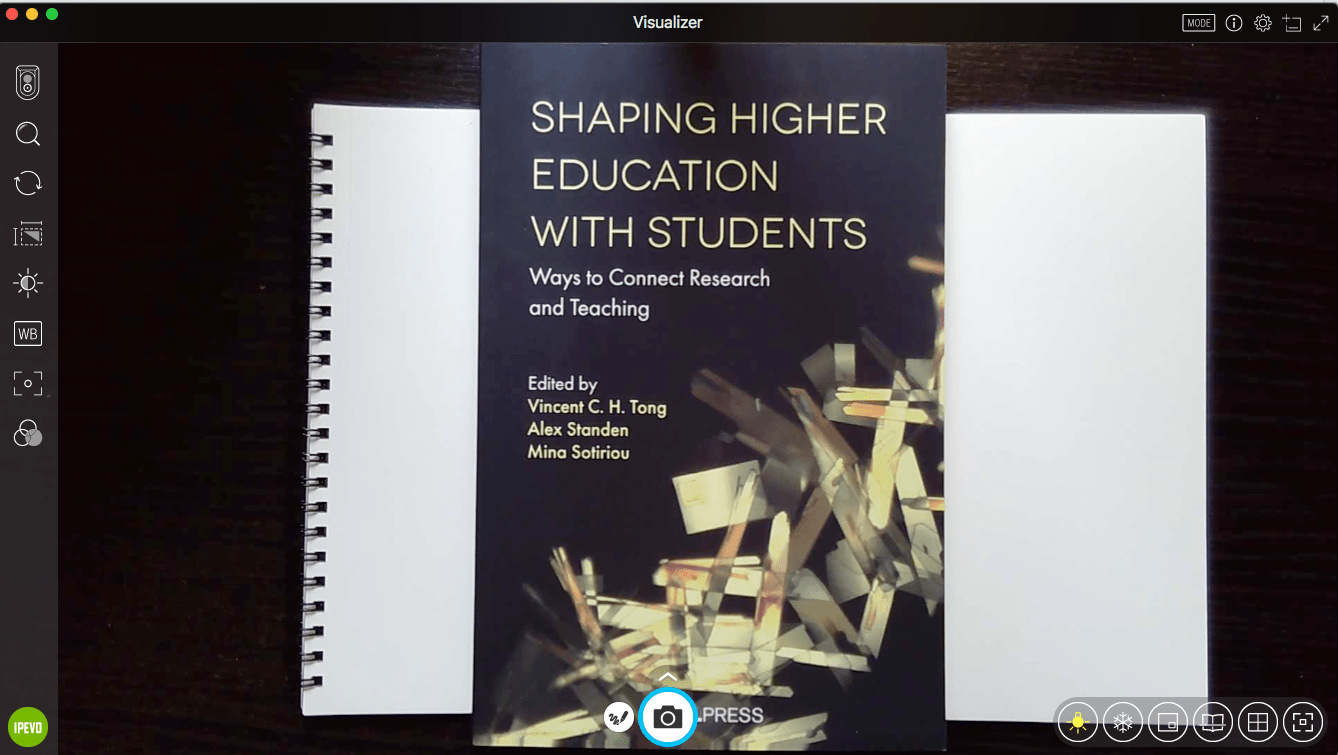
IPEVO Visualizer software showing controls
The Visualizer application can easily be shared in a Blackboard Collaborate room, and you can then move the window out of the way and focus on the participants. The image below shows me writing some simple maths on a notepad, captured by the camera, using the screen sharing feature of Collaborate to show this to other participants.

Writing equations which are shared within a Blackboard Collaborate room.
IPEVO offer another model, the V4K, for £100, which has a lower resolution sensor (but still good) and no light. Of course other companies are available, and I’ve heard recommendations of Genee and Aver models. These types of visualisers are often used in secondary schools, so any teachers you know may be able to give suitable advice.
One thing I particularly like about the IPEVO models is the design. The one I have folds fairly flat, so is easy to store away, so my living room doesn’t have to look like a lecture theatre. Here’s a comparison of its size when folded compared to a bottle of wine. And yes, it does fit in a wine rack.
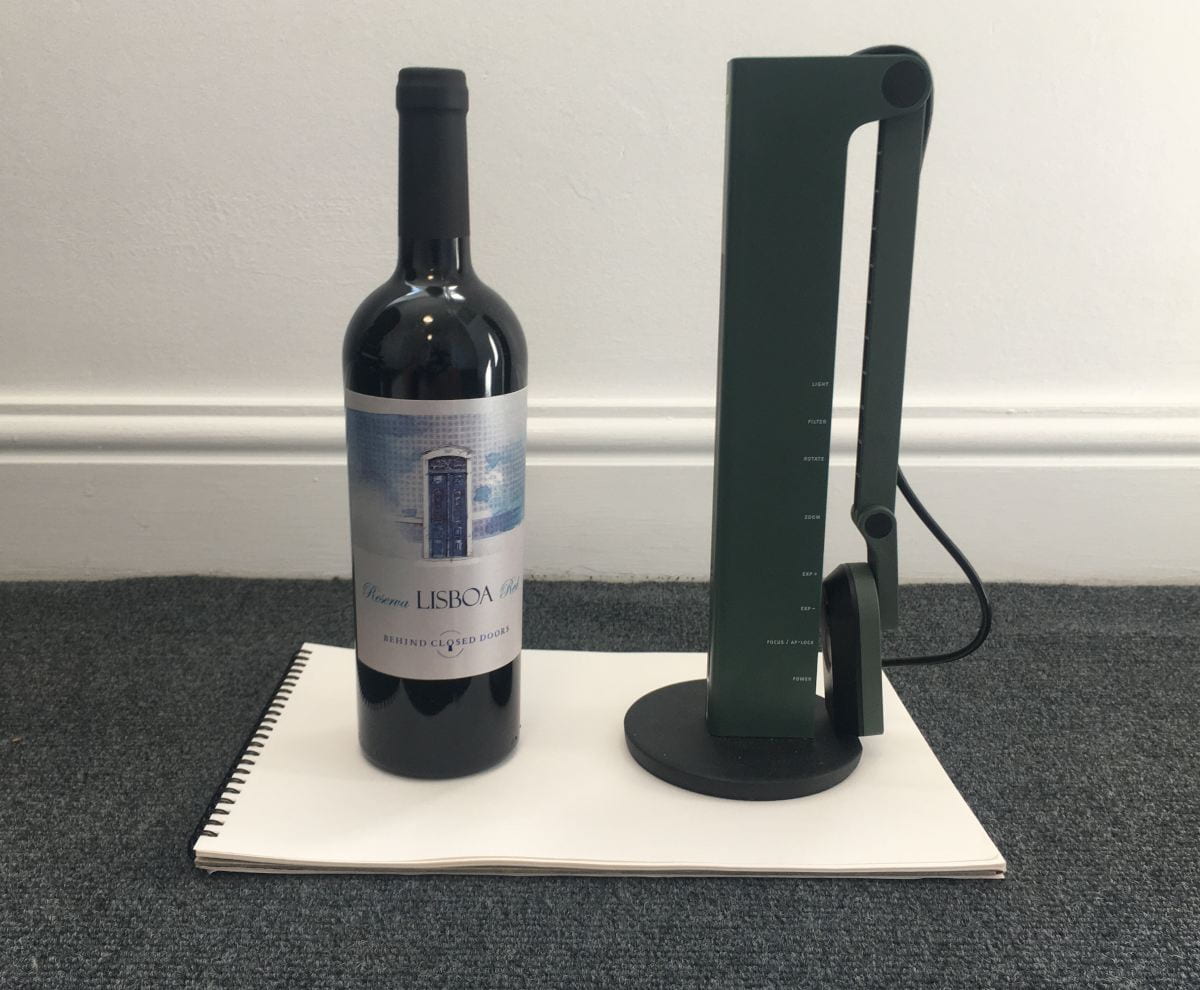
The IPEVO VZ-R folds down to the size of a bottle of wine.
Writing on an iPad or other tablet
Using an Apple Pencil on an iPad or a stylus for other devices, you can use a notes or sketch app to write on an iPad. This works fine as a standalone process, but you can also use software such as Reflector to mirror your device to your PC or Mac and screen share it as part of a call using Blackboard Collaborate, Zoom etc., or to record it from your screen using Lecturecast Personal Capture. If you have a Mac, you can also plug in your USB to Lightning cable and use Quicktime to mirror your screen by selecting your iPad as the camera source (thanks to Dr Steven Schofield from UCL Physics and Astronomy for that tip).
The short clip below shows Steven leading a revision lecture with his students. He reports that “I gave a two hour live revision lecture today; I was able to use the screen mirroring software to share my iPad Mini screen with the class via Blackboard Collaborate. It went really well and I had good feedback from the students. I think the overall experience is so much better than just talking to prepared slides. ”
Using a webcam
If you have a webcam that isn’t built in to your computer, you can use this too. We’ve tried a couple of webcams and it can work well, but may not have the full controls or handy features like the light that the VZ-R has.
If you have a laptop webcam above the screen, there’s further option using a mirror to give you a whiteboard surface. Again IPEVO has an option for this, or you can look at making your own using a 3D printer or just cardboard cutouts. John Umekubo has blogged about this, and John Mitchell from UCL has put it into practice. The much lower cost means it could be a great option for students to show their workings.
Using a graphics tablet
Graphics tablets are often associated with drawing and more artistic work, but can also be used for writing. It can be less natural as your writing is preserved only on screen rather than on the tablet itself, a difference between writing on paper. Wacom are the brand leader with many higher end products for artists, but for simple writing tasks more modest brands are also suitable. We’ve had good reports of the XP-Pen and Viekk brands. Feedback suggests that the size of the graphics tablet is more important than features like number of levels of pressure sensitivity if you are using it predominantly for writing rather than art.
Using a mobile phone or tablet
You may have seen tweets where inventive teachers have rigged up their phones to use as cameras. But how do you do this?
Well, IPEVO provide an app for that too. To make this work, you need three things:
- An Apple or Android phone on the same network as your computer (PC, Mac, Chromebook and Linux supported)
- An installation of IPEVO iDocCam on your phone
- An installation of IPEVO Visualizer on your computer
Launch the app on your phone, and then the Visualizer software on your computer, and your phone will appear in the list of available cameras.

Your phone shows as a camera in the IPEVO Visualizer software
And here is an example of it in use, with my old IPhone SE acting as the camera:

The final bit is to rig the phone up in a secure way, about 40cm above your desk. You might use a desk mount, or a pile of books, or some blu tack and string. How you do this is up to you, but this tweet from UCL’s Matt Whyndham might give you some inspiration. Happy writing!
 Close
Close