 Close
Close

Teams and Stream – recording your meetings
By Caroline Norris, on 23 April 2020
Did you know that you can record your Teams meetings, choose who can view and edit them, and add captions and transcripts?
Recording meetings
During a meeting you can click on the ellipses (…) on the meeting toolbar to access the Start Recording option. This is also how you Stop Recording. It’s that simple. There are some things you should know, though:
- It isn’t possible to set meetings to automatically record so someone needs to remember to do it manually.
- The recording only starts at the moment you choose Start Recording.
- Only one recording can be made at any one time.
- Recordings continue even if the person who started the recording has left the meeting.
- The recording stops automatically once everyone leaves the meeting.
- If someone forgets to leave the meeting, the recording automatically ends after four hours.
Accessing the recording
After the meeting, the person who recorded it will get an email notification with a link to the video in Stream. The recording will also appear in the Chat for that meeting. The recording is stored indefinitely but you can delete it if you no longer need it. It will disappear from the Chat after seven days.
Permissions
By default, anyone who was invited to the meeting (even if they didn’t join) and the Organiser of the meeting (the one who created the meeting and invited others) can view the recording. Only the Organiser of the meeting and the person who recorded the meeting are the Owner(s) of the video and can edit it. If the meeting was started in a Team Channel then whoever can access the channel will also be able to view the Stream recording.
Making changes to the video
Go to Stream and navigate to My Content > Videos:

Click on the pencil symbol to Update video details:
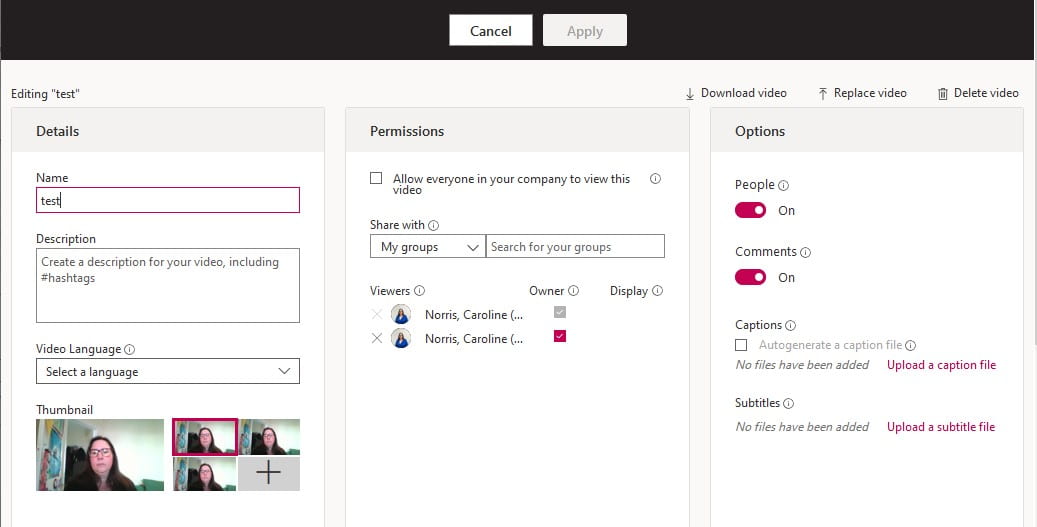
Here you can add captions and a transcript:
- Select a language from the drop-down on the left.
- Tick the Autogenerate a caption file option on the right.
You can also do things like change the title, add a description, give additional people permission to view or edit the video, and share the video. Click on Apply when you have made all the changes.
Going back to the list of Videos in My Content, click on the ellipses (…) to see the options to Trim or Download the video. Note that if you download the video to your computer the captions and transcript are not downloaded.
Find out more
More information is available on the Microsoft support pages:
- Record a meeting
- Play and share a meeting recording
- Delete a meeting recording
- Edit a recording transcript
We also have very comprehensive Recording in Microsoft Teams guidance available via the UCL Teams Support Centre.
Finally, this short video from University of Central Lancashire shows you some of the options for sharing videos with others: