 Close
Close

Using RPS to add publications to ORCID automatically
By Catherine Sharp, on 19 May 2020
![]()
Last week we wrote about how spending a few minutes setting up your ORCID record will repay you many times over, helping with grant applications, online profiles and the like. We talked about some of the nifty things you can do with ORCID, like creating a QR code to put in a poster or presentation. Most of you already know about “auto-claiming” publications containing your ORCID into RPS (and even “auto-rejecting” others), saving you having to review long lists of publications that match your name. A whopping 72% of UCL researchers, nearly 4,000 of you, have added your ORCID to RPS for auto-claiming.*
Even if you’re using your ORCID whenever you publish, until now it hasn’t been plain sailing getting publications into your ORCID record, especially since this was completely separate from adding them to RPS. There’s now a new tool in RPS that makes this much, much easier.
*By faculty, UCL Institute of Education researchers top the table at 81%.
The old way: using ORCID to record publications
Until now, you’d use “auto-update” in ORCID, from a third-party source like CrossRef, to import publications that contain your ORCID to your ORCID record. To add publications that don’t contain your ORCID, you’d select publications matched to your Scopus record and/or ResearcherID, add them manually, or upload a BibTeX file.
If this sounds like a lot of effort, read on.
The new way: send to ORCID from RPS
You’re already recording your publications in RPS so that you can make them open access, select them for REF, and include them in your IRIS profile. Now, you can send them to your ORCID record automatically. This gives you the added benefits of a permanent ORCID record of your publications, without any extra work.
Take a moment to enable send to ORCID in your RPS profile (see below); then make sure you’re using your ORCID, e-mail address, Scopus ID, arXiv ID and/or ResearcherID to auto-claim publications into your RPS record. Your auto-claimed publications from all of these sources, as well as any you claim yourself based on matches to your name, and any that you add to RPS manually will all be sent to your ORCID record. Job done.
How to do it
For privacy reasons, you need to authorise RPS to send to ORCID, even if you’ve already allowed RPS to talk to your ORCID record for auto-claiming. Even if you’ve forgotten your ORCID password, it should take no more than a minute.
- Click on the Menu tab near the top of your RPS home screen. In the My Account column, choose ORCID Settings.
- Click on Connect your ORCID iD.
- If you’ve previously recorded an ORCID in RPS, you’ll be sent to an ORCID login screen. If you haven’t, but you have an ORCID account, click on Sign into ORCID. (If you don’t have an ORCID at all, you can set one up by choosing Register now).
- Click Authorize to allow RPS to update your ORCID record.
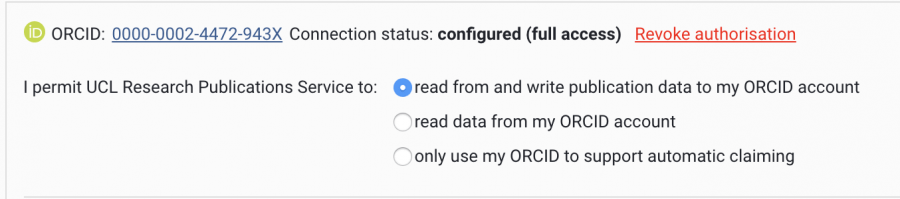
- When you’re sent back to RPS, choose the first option, “read from and write”.
Your existing and new publications will be sent to ORCID automatically within a day or two. Clicking “Run Sync” on this page (see the image in the next section) isn’t necessary, but will speed up the sending. Once publications been added to ORCID, you’ll see an option on this page to remove them; you can also combine, delete and edit them in ORCID.
Extra send to ORCID settings
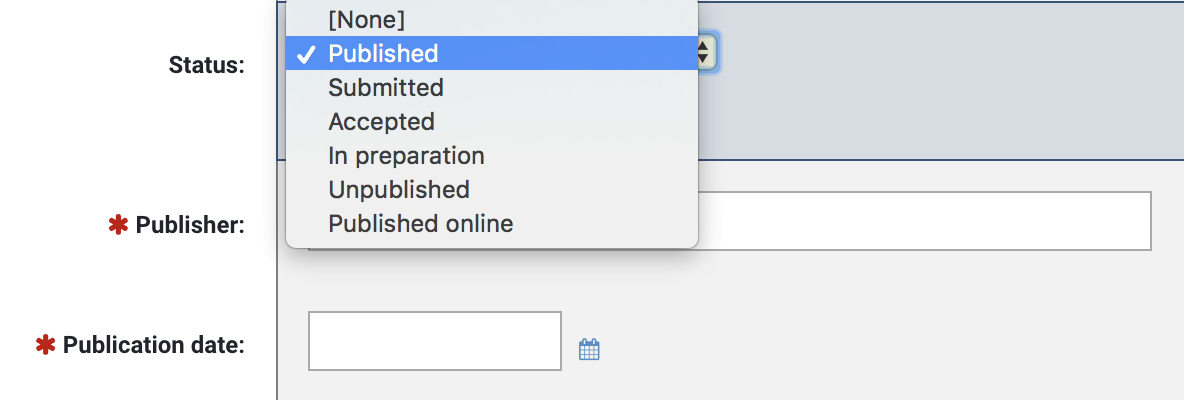
After you set up send to ORCID, the ORCID Settings page will give you a few options. By default, RPS won’t send journal articles with a status other than “published” or “published online”, nor publications you’ve marked as private (by clicking the eye icon in your publications list). Untick the first box and RPS will send journal article records regardless of their publication status. Tick the second and it’ll send publications even if you’ve marked them as private.
If you want to select specific publications to send, you can tick the option “Only send favourite publications”. You’d use the heart icon in your publications list to select favourites.
We’d suggest that you click “Send affiliation” at the bottom of the page: this will add your UCL affiliation to your ORCID record.

If some of your journal article records in RPS were created manually, they might not have a status. If you don’t want to change the default send to ORCID settings, you can add the “published” or “published online” status to individual records.
More about RPS and ORCID
You’ll find more on our ORCID webpages. For guides to auto-claiming using ORCID, e-mail address, Scopus ID, arXiv ID and/or ResearcherID, and information about how RPS selects publications it thinks are yours, see the section on our RPS training page called “Recording publications in RPS”.
Look out for future posts on RPS and ORCID. To get an alert when we post new articles, fill in the “Subscribe by Email” section on the right of this post (or below, if you’re reading on your phone).
